Swap and Share guide created by Julie Samuels.
Follow these steps for successful dividing, planting and care of your new plants.
- STORAGE: In the spring and once you have removed the plants from the garden, it’s best for you to re-plant these plants as soon as you can so they can start setting down roots. In the fall you want them to do this before winter arrives! If you have to delay planting them, Keep the plants in a cool , shady place, keeping the soil cool and damp (not soggy) until you can get them into the ground.
- SOIL PREPARATION: Prepare your site by breaking up the soil using a sharp spade or hoe. Add some organic matter (compost) a good shovel full for each square foot of garden. Work it into the garden bed by turning over the soil with a shovel or spade. It is not really necessary to “fertilize” these plants because fertilizing will promote new growth of the plant, preventing the roots from having enough “energy” to grow as much as they should. It is more important for the roots to grow than for the plants and leaves to grow after planting.
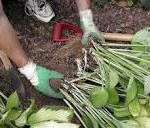
- PLANT PREPARATION AND PLANT DIVIDING: With a sharp spade or shovel, dig around the plant you want to divide. Remove it from the ground, placing it on the ground nearby. You may be able to “divide” it into two or more plants. Look carefully and you will see individual plants whose roots are intertwined. This means that there are several individual plants coming up and you can divide them and plant them separately.
Divide by cutting down through the crown (where the plant is coming up out of the soil) and then down through the roots using a sharp trowel, spade or even a knife. A good sized plant root ball is about the diameter of a baseball. Keep plants in a bucket of water if they will be out of the pot for more than 30 minutes. If you are sharing and swapping, you can place the watered plants in a plastic bag or pot and be sure to keep them watered until the sharing and swapping will take place. - PLANTING: Dig a hole for each plant as deep as the roots, just to the top of the crown. Place each plant in the hole and cover the roots with soil. Pack the soil lightly to get out some of the air pockets. Make sure the crown and leaves of the plants are buried as they could rot if too deep and will dry out if not deep enough. Trim the green leaves of the plant to about 3-4 inches so the plants energy will go into root development and not leaf growth. In order for the plants to survive the winter the roots need to grow as much as possible before frost sets in.
- SPACING: Plant your plants 1 to 2 feet apart. These plants will come back every year and will spread out, needing room to grow to their mature size. After a few years you can divide them again! Consider “massing” 2 or 3 of each variety of a plant together, rather than mixing the different varieties apart all over the garden bed.
- WATERING: Once everything is planted at the end of the day, water everything well. (Even the plants you may have not had time to plant yet and are still in bags or pots) In spring, water these plants 2-3 times a week the first season, if the weather is dry. Touch the ground near the plant and if it’s dry, water slowly and gently so the soil will not be washed away and the water will go deep. This encourages the roots to grow and establish themselves.
- MULCHING: It is very good for the health of the plants to spread compost, woodchips, straw, grass clippings or fallen leaves 2-3 inches away from and around the base of each plant. This will keep the moisture in and reduce the amount of extra water necessary and it will add nutrients to the soil. This practice also reduces the growth of weeds in the garden, so adding some mulch each spring and fall is a good way to a healthy and weed free perennial garden. Other things like newspapers and even old carpets can be used like mulch to retain moisture and keep down weeds. Be careful not to bury the crown of the plant as it can cause the plant to rot.


